Honey and Garlic Tonic: The Simple Cold-Season Recipe Everyone Swears By
How to Make It, Step by Step
- Peel the garlic cloves and lightly crush each one with the flat side of a knife. Crushing helps release garlic’s natural compounds.
- Place the cloves in the clean glass jar.
- Pour the honey over the garlic until every clove is fully covered.
- Add your optional extras if you like — cinnamon, peppercorns, or lemon zest.
- Close the jar and leave it at room temperature for 3–5 days. Loosen the lid once a day to release any bubbles.
- Move the jar to the fridge. The flavor is best after 1–2 weeks, when the garlic turns mild and sweet.
A little extra detail at each stage will help your first jar turn out beautifully.
Step 1 — Peel and crush with care. Place a clove under the flat side of a wide knife and press firmly with the heel of your hand. The skin will loosen and slip off, and that same press lightly crushes the clove. Crushing breaks the cell walls, allows garlic’s natural compounds to form, and helps the honey penetrate. Do not mince the garlic — whole, lightly crushed cloves keep a pleasant texture and are easy to eat later. Let them rest for about 10 minutes before they go into the honey.
Step 2 — Fill the jar loosely. Do not pack the cloves down tightly. Honey needs to flow between them and coat every surface.
Step 3 — Pour slowly and cover completely. Pour in stages, pause, and tap the jar gently on a folded towel to release air pockets. Nudge any clove poking above the surface back down — every clove should stay under the honey. If your honey is too thick to pour, stand the closed jar in warm water for a few minutes. Do not microwave it or use boiling water, as high heat is not kind to raw honey’s flavor.
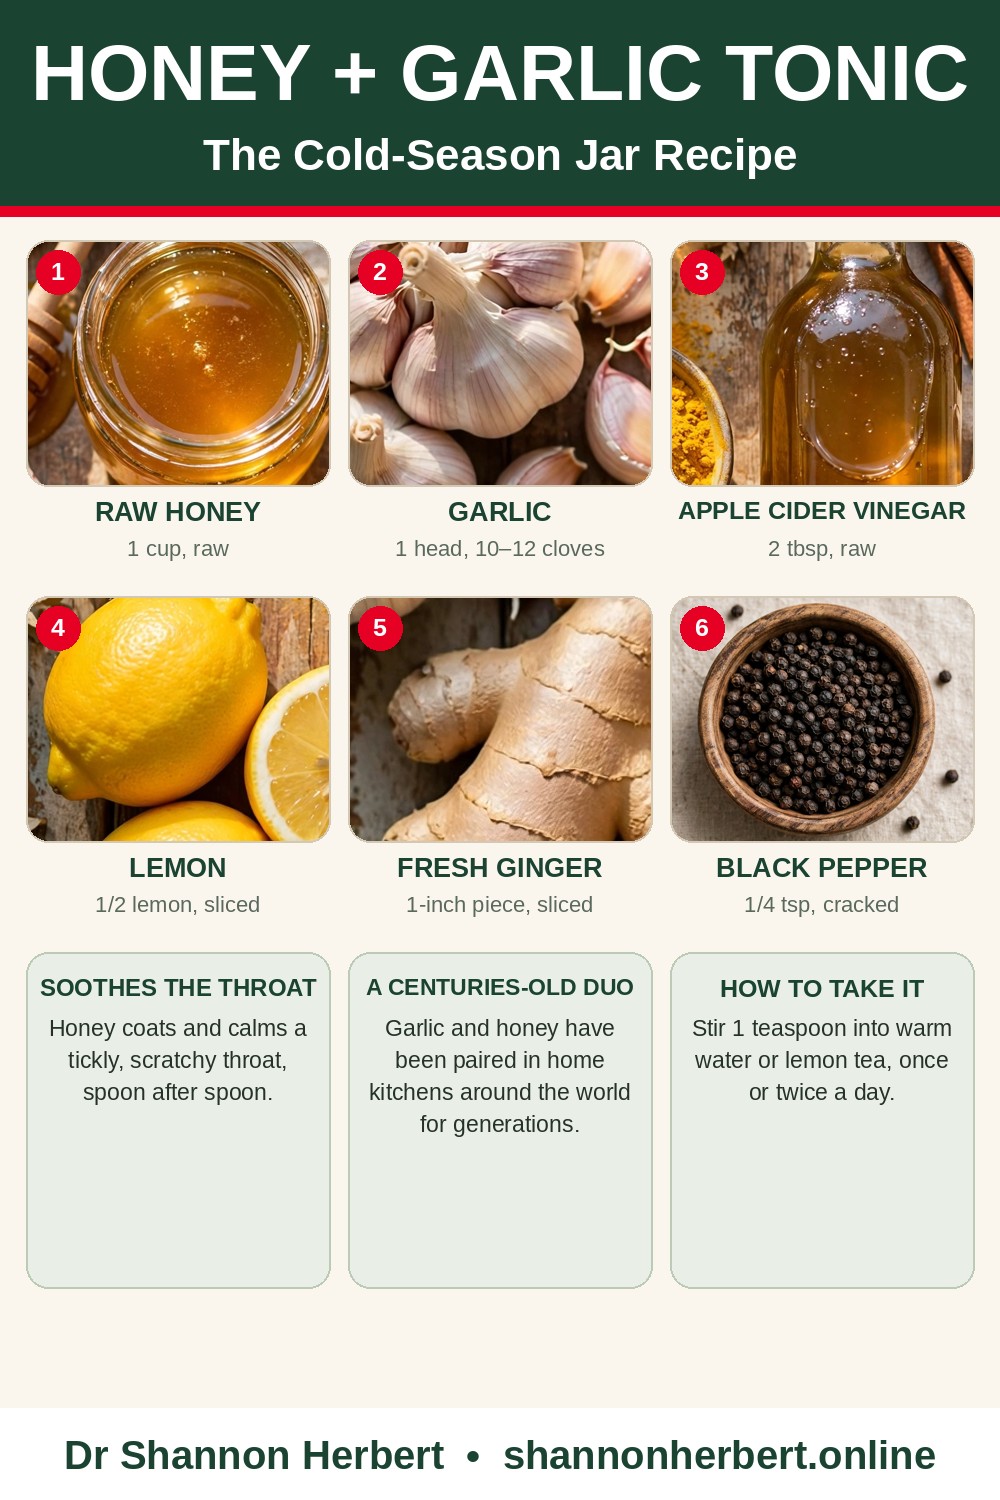
Step 4 — Add extras sparingly. A pinch of ground cinnamon or one small stick adds warmth. Three or four black peppercorns add gentle background heat. A strip of lemon zest, avoiding the bitter white pith, adds brightness. Try one addition per jar at first, so you learn which flavor you like best.
Step 5 — Rest and burp the jar. Keep the jar in a cool spot out of direct sunlight. Once a day for the first 3 to 5 days, loosen the lid just enough to let bubbles escape, then close it again. The honey will become runnier — that is moisture leaving the garlic, and it is expected. If cloves float, swirl the jar or press them back under with a clean spoon.
Step 6 — Refrigerate and wait. You can use the tonic right away, but patience rewards you. At one week, the garlic is still fairly bold. At two weeks, it is noticeably milder and sweeter. At three to four weeks, many people find it perfect — soft, mellow, and almost snackable straight from the jar.
How People Use It
Most people take 1 teaspoon of the honey, or eat one honey-soaked clove, once or twice a day during cold season. You can also stir a spoonful into warm (not hot) lemon water.
That is the classic way, but there are other gentle, food-based ways to enjoy the jar:
- In warm lemon water or herbal tea: Stir a teaspoon into a mug that is warm enough to sip comfortably, not boiling. Very hot water dulls honey’s flavor and is harsh on a sore throat anyway.
- Over toast or yogurt: A chopped honey-soaked clove over buttered toast, or a drizzle over plain yogurt, turns the tonic into breakfast. Pairing it with filling, balanced meals matters in winter, too — ideas like those in our guide to healthy meals that keep you full can help you build plates that actually sustain you.
- In dressings and marinades: Whisk a teaspoon with olive oil, lemon juice, and a pinch of salt for a quick dressing. The garlic is mild by then, so it tastes savory-sweet rather than raw.
- With roasted vegetables: A small drizzle over roasted carrots or sweet potatoes uses up the jar deliciously when cold season is fading.
However you use it, start small: begin with half a teaspoon of honey or half a clove, see how your stomach feels, and increase slowly. Taking it with or after food is gentler for many people than taking it on an empty stomach.
Simple Variations to Try
Once you have made the basic jar, you might enjoy one of these traditional twists. Change only one thing at a time so you know what you liked.
Ginger version: Add 3 or 4 thin slices of fresh ginger. Ginger adds warmth and is a classic partner for honey in winter drinks.
Turmeric and black pepper version: Add half a teaspoon of ground turmeric and a pinch of black pepper. The color turns deep gold, and turmeric can stain, so use utensils you do not mind marking.
Thyme version: Add a sprig or two of fresh thyme, washed and dried well — a herb long associated with winter teas and cough-season cooking.
Lemon version: Rather than adding lemon juice to the jar, stir the finished honey into lemon water each time you serve it. That keeps the jar simpler and better-keeping, and each mug tastes fresh.
A tonic is a small habit; your everyday meals do the heavy lifting. Our simple nutrition tips and our 5-day healthy meal plan can help you build that foundation without overcomplicating your week.
Storage, Shelf Life, and Signs Something Is Wrong
Store the finished tonic in the fridge and use it within about 2 months. Always use a clean, dry spoon — never one that has been in your mouth or in another food — because crumbs, water, or bacteria shorten the jar’s life.
Good signs: the honey smells sweet and garlicky, the cloves look plump and slightly translucent, and the flavor grows milder. A little bubbling in the first few days, a thinner texture, and mild cloudiness are all normal.
Warning signs: visible mold, a strong alcoholic or rotten smell, fizzy overflow that keeps returning after the first week, or slimy cloves. If you see or smell any of those, do not taste it to check. Discard the whole jar and start again. When in doubt, throw it out.